In my review of the Nikon D300, I promised to look into its Active D-Lighting feature. Besides pure intellectual curiousity, and the deep desire to be helpful to my readers, I needed to know how to manage this camera setting. As I noted in an earlier post, Active D-Lighting is written up as a kind of in-camera extension of dynamic range. In fact, I assume that the “D” in D-Lighting is short for “dynamic.”
The manual for the D300 puts it like this: “Active D-Lighting preserves details in highlights and shadows, creating photos with natural contrast. Use for high contrast scenes, for example when photographing brightly lit outdoor scenery through a door or window or taking pictures of shaded subjects on a sunny day.”
As described in the manual, Active D-Lighting is potentially a very compelling feature because digital technology can be used in real time to record a great range of lights and darks in a photo.
Settings and Caveats
To set Active D-Lighting, you use the D300’s shooting menu. You scroll down to the Active D-Lighting item until it is highlighted, press the right arrow key, and select from four possible Active D-Lighting settings: Off, Low, Normal, and High. The manual gives no information about the relative impact of these settings, hence my need to find out empirically (and this blog story).
The caveats you’ll find in the manual regarding Active D-Lighting are that photos with Active D-Lighting engaged take longer to process (this is presumably because more information is being written to memory) and that the lgiht meter must be set to matrix metering (okay, since this is probably how you’d have it set anyhow).
The manual also notes that “Active D-Lighting” is not the same thing as “D-Lighting”, the latter being a post hoc fix to dynamic range available in the camera’s retouch menu after a photo has already been shot and saved to memory.
As far as I can tell, although this isn’t noted in the D300 documentation, Active D-Lighting also does not work when the camera is set to fully manual mode (more on this later).
Methodology
Active D-Lighting is designed for situations with high contrast from light to dark. This is what the manual states, and it is also common sense. If Actibe D-Lighting workes right, these high contrast situations result in images that demonstrate a High Dynamic Range, HDR for short. Therefore, I tested Active D-Lighting with a series of exposures in high dynamic conditions.
I shot the photo immediately below in the surgeon’s quarters in old Fort Point under the Golden Gate as part of one of these series. The photo shows a fairly extreme dynamic range between the bright sunlight coming in through the opening in the stairwell and the dark shadow of the closet on the left. It’s the best of the series (described below) that I shot.
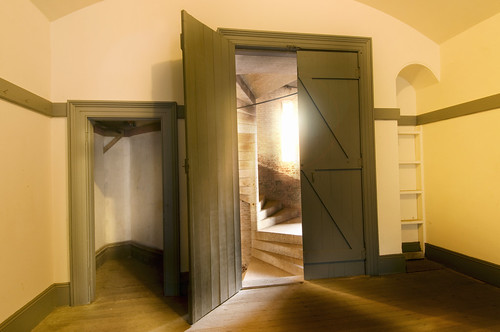
View this image larger.
The photo far below is of the staircase in our house, also with a high dynamic range. Like the Fort Point photo, it’s the best result of experimenting with Active D-Lighting settings.
For each series, I shot a series of photos at all four Active D-Lighting settings. For each Active D-Lighting setting, I made an exposure using Programmed automatic, Aperture-preferred, and Manual metering. Obviously, this resulted in a 4X3 grid of exposures in each series.
Conclusion
The D300 manual is correct when it suggests that turning on Active D-Lighting reduces the overall exposure (with the degree of this effect determined by the setting, High reducing the exposure to a greater degree than Normal, and Normal having more impact than Low. At the same time, the Active D-Lighting effect does preserve some details in areas that might otherwise go black, for example the floor in the photo of Fort Point above. Active D-Lighting was most impressive in reducing blow-out in the bright parts of the image while not losing detail in shadow areas.
Still, overall I was disappointed in the impact of Active D-Lighting when I made A to B comparisons. First of all, the setting seemed to do nothing when I used manual exposure settings. This is unfortunate for me, because the bulk of my exposures are manual.
Secondly, the impact of Active D-Lighting overall was just not huge. It tames photos with great dynamic range slightly, but not enough to salvage images with extreme dynamic range. There is no quick fix, at least yet. My opinion is that automated HDR post-processing solutions tend to look artificial and vulgar, so one still needs to multiprocess RAW files by hand (possibly using extreme bracketing).
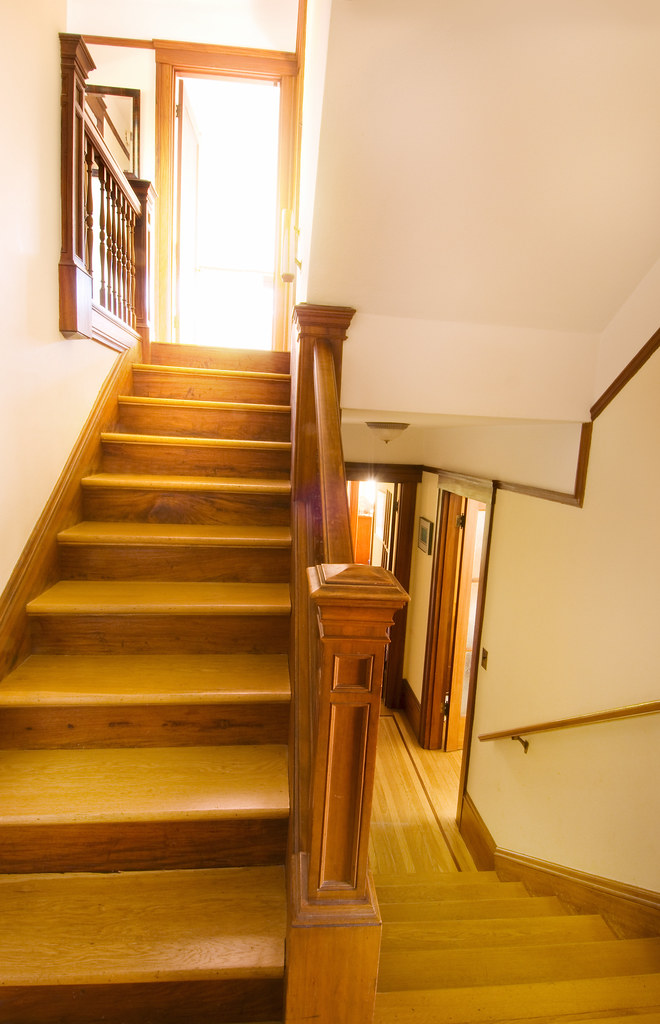
View this image larger.
And where will I set Active D-Lighting as I prowl the world looking for great photos? My conclusion based on my test series is that it really doesn’t matter much, so I’ll probably leave the setting at the default, which is Normal.