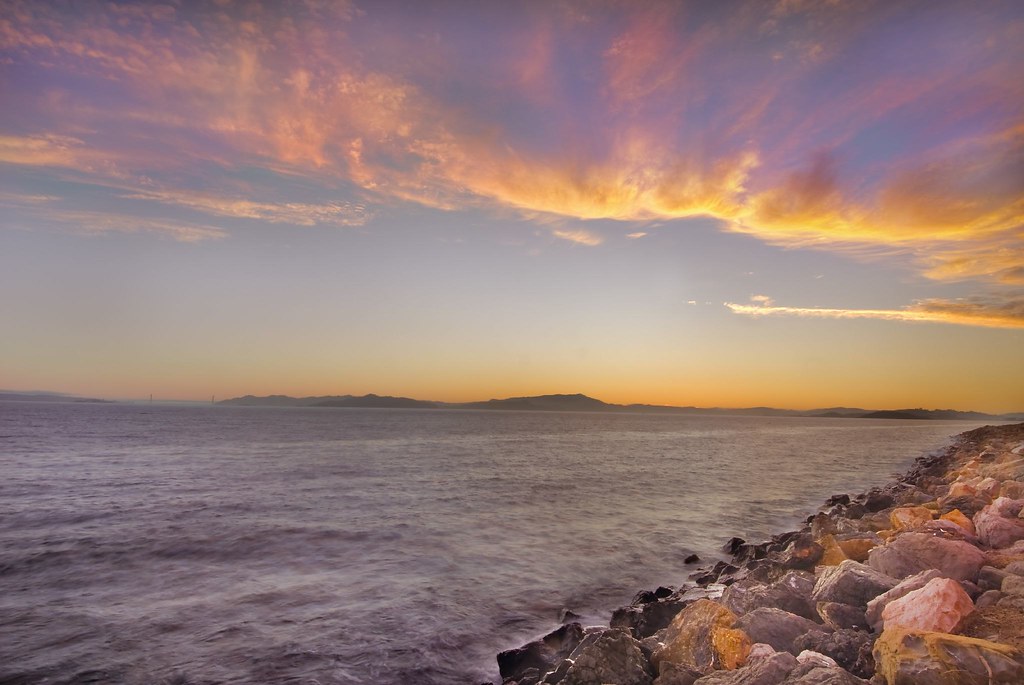
How do you work with landscapes that show an extravagant dynamic range? I was down by the Bay photographing sunset. It was clear to me that the scene had great dynamic range, from the blown-out highlights in the clouds to the deep shadows in the rocks along the shoreline. My normal approach to this situation is a kind of ad-hoc HDR (High Dynamic Range) processing, although whether it really is HDR is a matter of definition. I’ll explain what I mean in a moment.
This time, I decided to take a set of different exposures and see how well the Photoshop CS3 HDR automation worked to automatically combine the exposures (hopefully exposing correctly for both the shadows on the right, the dark ocean, and the bright sky).
To set the HDR merge up, the camera was of course locked down in position on a tripod. I held the aperture constant (f/22), and made ten expsoures, varying the shutter speed between two seconds (the rocks) and 1/10 of a second (the brightest part of the sky).

View this image larger.
I tucked the set of exposures in a single folder (so I could add them all to the HDR automation in one fell swoop). When I looked at them in Bridge, I felt that the dark rocks were still too dark, even with the two second exposure. So I opened all the images in Photoshop, using a generic color balance setting for the RAW conversion, and opened (and saved) several versions of the exposure outliers, manipulating the RAW conversion to create an even greater dynamic range between the files.
After all this fuss, the results of running the HDR automation weren’t terrible, but I wasn’t thrilled. Photoshop also sent me up a notice saying I’d do better with straight, unconverted RAW files, so I tried the experiment again, doing it Photoshop’s way this time. These second results really were terrible.
I tried some pretty wild approaches to fixing the automated HDRs, including combining them and/or combining in some of the original images. However, Photoshop’s image alignment when it did the HDR automation had me very slightly out of register with the original images, so this didn’t really work.
OK, so I’m coming to the conclusion that I’ve come to before: combining images and image variants is something that humans do better than software (at least for the time being). I created the version of the image above using four layers processed at various exposure settings from one of the RAW “negatives” calibrated for the sky, and adding a layer from the two second version (calibrated for the dark rocks). A steady hand and the Photoshop Paintbrush tool is crucial for this kind of thing.
Is this really HDR? I’m not exactly sure: while it does extend the dynamic range of the original capture, it’s really more like a digital version of the zone system: exposing for the the highlights and processing for the dark areas.
Pingback: Photoblog 2.0: » Photoblog 2.0 Archive: » Active D-Lighting on the Dipsea Trail
Pingback: Photoblog 2.0: » Photoblog 2.0 Archive: » Active D-Lighting
Pingback: Photoblog 2.0: » Photoblog 2.0 Archive: » Red Flowering Dogwood Blossom
Pingback: Photoblog 2.0: » Photoblog 2.0 Archive: » Gaillardia x grandiflora
Pingback: Photoblog 2.0: » Photoblog 2.0 Archive: » Yosemite Morning
Pingback: Photoblog 2.0: » Photoblog 2.0 Archive: » Do Over
Pingback: Tone Poem | Photoblog 2.0