What is the appeal of black and white photography? After all, we see the world in color, and a gray day is emotionally perceived as depressing and monotonous.
Historically, black and white is easy to understand. Monochrome photographic processes were invented long before color. Even once color arrived on the scene, it was largely “yellow box”: you snapped the photo, sent the film cartridge off to Kodak, and got slides or prints back. If you wanted to do artisan quality work and control the processing and printing you pretty much had to work in black and white.

Today, color offers pretty much the same level of control as black and white. Most images start out life as digital captures. Then they can be post-processed on a computer using the software of your choice (mine is Adobe Camera Raw (ACR) and Photoshop). So the reasons for choosing black and white are aesthetic:
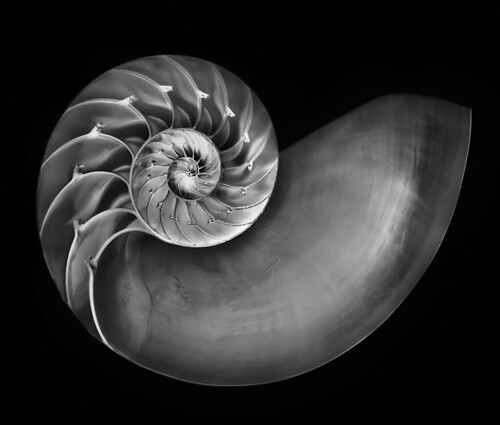
- Reducing the image to monochrome shows its compositional “bones”
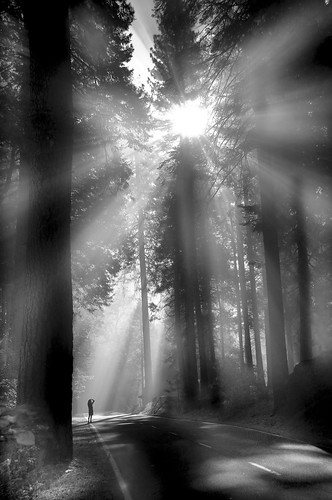
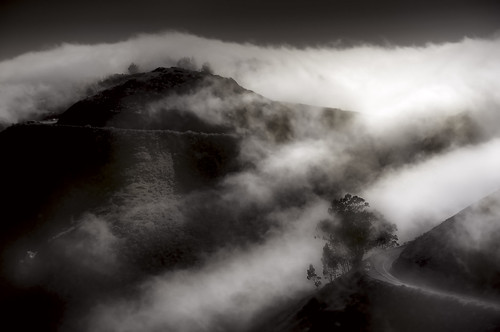
- Black and white can produce a wonderful emotional response in the viewer that is either dreamy and contemplative or else exalted
As I’ve noted, simply dropping greyscale information doesn’t produce satisfactory results. But there are a number of established techniques that give you a great deal of control over the actual conversion of an image to monochrome. These include using the Channel Mixer (here’s a story explaining the “Ansel Adams” Channel Mixer settings), B&W Adjustment layers, and the conversion filters that Nik Software provides. One of these techniques is necessary for black and white conversion but not sufficient. You also need to understand the following general ideas:
- Don’t use your camera’s black & white shooting mode. This just discards the color information. The only reason to use an in-camera b&w mode is to get a preview of what a monochrome image would roughly look like: then switch back to normal mode to actually make the capture.
- Don’t just discard the color information in your computer. Grey channel data by itself will be flat and boring.
- Do work with your image in color to get it to where you want before converting it to black and white.
- Do understand that you can use layers to apply different conversion settings to different portions of an image. This is the single most important issue in artisan-quality black and white imagery.
- Do work to enhance a black and white image after conversion.
- Do leave your image in RGB or CMYK rather than converting to greyscale (unless a single channel is needed for a physical printing process). Once your image is black and white collapsing the channel won’t change its appearance, and there is no benefit other than saving a bit of disk space.
Here’s my Flickr monochrome set. From top to bottom, the images in this story:
Pingback: Harold Davis on shooting black and white in the digital era – iso200
Pingback: Theme: Woven – Exploring Colour