
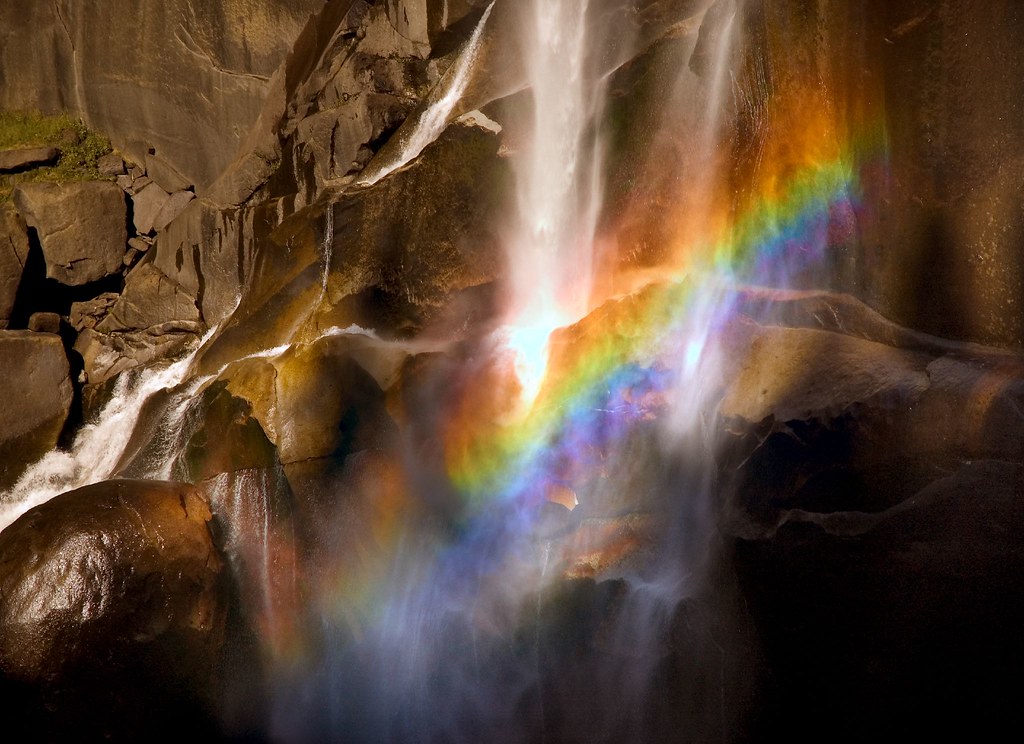
I took this photograph in early October several years ago along the Mist Trail which runs beside Vernal Falls in Yosemite Valley. One is pretty sure to see multiple rainbows from the Mist Trail no matter when one climbs it, although Vernal Falls will get you wet in the spring and not in the autumn (here’s a spring photo!).
I am in the process of preparing this image for publication. When I looked at my original conversion of the photo, I felt that I’d like to see a bit more of the shadow areas, and also a bit more punch in the rainbow colors.
My new post-processing took a bit of fancy footwork. In order to capture more of the shadow detail, I imported four different exposures of the RAW original and combined them using layer masks and the Photoshop Paintbrush Tool.
A side note here: I don’t really consider this kind of post-processing High Dynamic Range (HDR) imaging. HDR creates a far great dynamic exposure range than you find in a conventional photo, usually by combining several exposures. I work within one exposure. (You couldn’t really take multiple images that are identical except for exposure of a moving waterfall and rainbow in any case.) This gives me a 5 or 6 f/stop range or possible exposures, which should be enough.
In my opinion, most HDR images look a tad artificial, and I am trying for a more natural look. (I realize that I am taking a risk in mentioning this in the context of the Rainbow image, which does look almost super real.)
My next challenge was to get more color into the rainbow. Here’s where CHOPs (short for channel operations) come into the story.
I converted the image to LAB Color mode. I duplicated the image. Next, on the duplicate image, I adjusted the A channel used Image > Adjustment >Equalize. This creates an extreme color shift in the channel. I then pasted the entire duplicated image onto a new layer in the original image, masking out everything except the rainbow. I cut the opacity of the pasted layer down to 30%, and switched the blend mode fron Normal to Color. I also added a bit of Gaussian blur to the new layer. This doesn’t impact the sharpness of the L (luminosity) channel, and the L channel is the key to managing image sharpness in LAB mode.
I repeated this process for the B channel.
The rest was just my routine workflow that I use for processing any image.
Morals of this story: It’s good to be a CHOP jock. And digital photography takes plenty of digital chops.
Pingback: Photoblog 2.0: » Photoblog 2.0 Archive: » Simplicity
Pingback: Photoblog 2.0: » Photoblog 2.0 Archive: » Dragonfly
Pingback: Photoblog 2.0: » Photoblog 2.0 Archive: » Trio of Double Hellebores
Pingback: Photoblog 2.0: » Photoblog 2.0 Archive: » Fire Spiral in the Flower