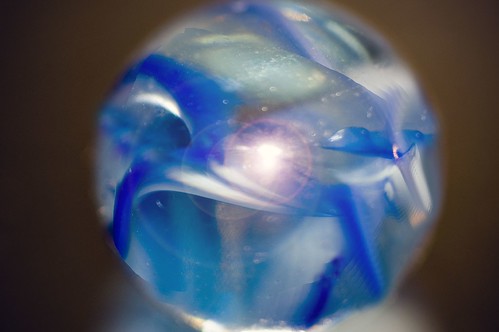
Take a good steady tripod and an excellent 105mm macro lens and a marble on a mirror. That’s a good start. Adding an extension tube to get even closer is wow! Terrific!
It’s great to stop the lens down to f/40 and get everything nice and sharp. But what happens if you use the strobe and get shallow depth of field, and shallow exposure? A mystical look…
Use the Clone tool to extend the bands of blue and white around the marble, er, world. Next, use the Lasso Tool to select the center of the globe, and use the Distort > Spherize Filter to make it all rounder, and somehow more three dimensional. Modify the solar flares by using the Render > Lens Flare Filter to change the highlight in the center to a moderate lens flare. Here’s the intermediate effect:
Next, save off the image, and start working on a copy to have more fun safely.
Add some black around the edges using the vignetting feature in the Distort > Lens Correction Filter.
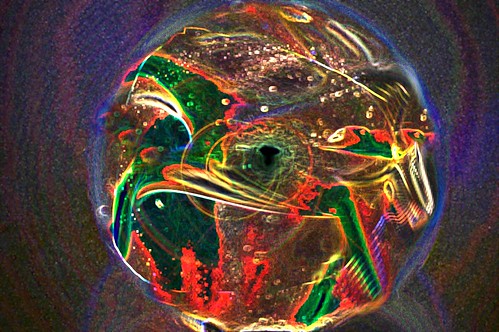
Here’s where the metal hits the road: Use the Stylize > Glowing Edges Filter with Edge Width and Edge Brightness set quite high and Smoothness set very low to add the wonderful colorful effect in shown at the beginning of this entry. Here’s a tip: resize the image so that it all fits within the filter dialog so you can see what you are doing as you change the Glowing Edges Filter settings in real time.
For that final soupcon of manipulation, use the Adjustments > Hue/Saturation dialog, with Blue selected, to up the saturation of the blue elements of the image.
Note: I’ve omitted standard workflow steps from this process, such as adjusting levels, contrast, and color, sharpening, and cleaning up the image (most very close macros tend to have a least some nasty specks and hairs).
Pingback: Photoblog 2.0: » Photoblog 2.0 Archive: » Breakfast at Bodie
Pingback: Photoblog 2.0: » Photoblog 2.0 Archive: » From Filter Play to Layer Masking
Pingback: Thanks for All the Fish | Photoblog 2.0
Pingback: Lily Inside