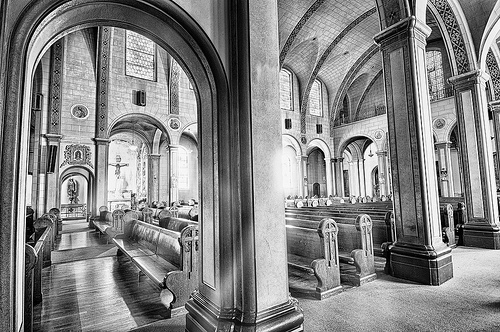
I’ve been asked a number of times about the process behind the making of my images of the Basilica Mission Dolores, shown below and in Looking for Light. This is a monochromatic style that I’ve developed intentionally that is based upon High Dynamic Range (HDR) shooting techniques. For other examples of this presentation style, which is intended to partially evoke an old-fashioned etching look see my Agaves and Choosing the Path. You’ll find some hints about how I do this below.
Shooting Technique
The most important part of this process is the HDR shooting technique. It also helps to start my photography at the very beginning with a final image pre-visualized in black and white—even though a RAW capture by definition includes all the color information.
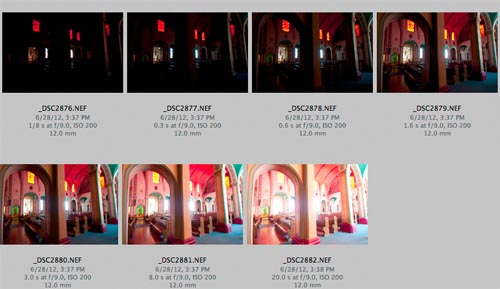
As I explain in Creating HDR Photos: The Complete Guide to High Dynamic Range Photography, when I shoot for HDR I am careful to use a sturdy tripod. I find that manually bracketing the shutter speed works best. The sequence of seven RAW captures I made for this image are shown below in Adobe Bridge. All exposures were using a 12mm wide-angle focal length at f/9 and ISO 200. My shutter speeds ranged from 1/8 of a second (the darkest) to 20 seconds (the lightest).
Nik Mono HDR Preset
Because I knew that my ultimate destination was black & white, one of my first steps was to run the seven captures through Nik HDR Efex Pro, choosing the Soft Mono HDR preset. This is preset converts a bracketed HDR set of captures to monochromatic by setting the saturation slider to 0%. Results are shown below.
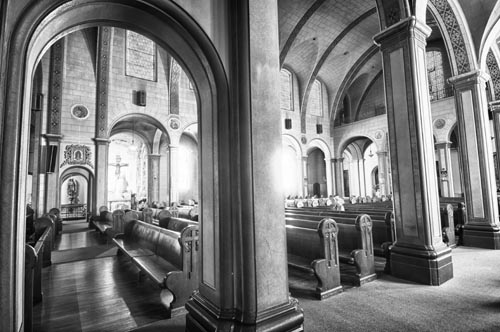
Having processed the files this way, I put the Nik HDR monochrome version aside for use at a later stage in the process.
Color Version
I created the initial color version, shown below, by layering dark and light versions together in Photoshop. The basic scheme was to use a fairly light exposure (#2881, at 8 seconds) as the background, then selectively paste a lighter exposure over it for the darker areas (#2882, at 20 seconds). Areas that were too bright—such as the windows—were controlled with a darker exposure (#2878, at 3/5 of a second). Note: you can see the different exposures in the figure showing Adobe Bridge above.
The initial color blend is shown below.
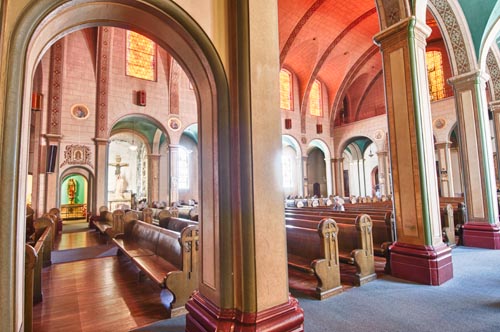
Rarely do I construct one of these images without finding flaws that need to be retouched. In this case, I decided to remove a woman sitting in a pew, a devotional man at a niche, a fire extinguisher, and a cut-off statue. The layers panel with each of these corrections is shown below and to the right.
At any normal viewing size one can hardly see these issues, but on 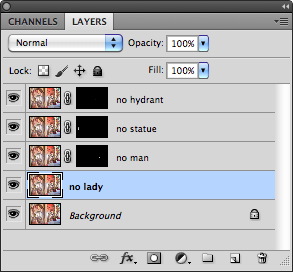 my large monitor when I zoomed in they were clear. It’s a funny thing—even though some issues are hardly noticeable at a conscious level, I do find they make a significant difference in terms of the viewers overall impression of an image once they are cleaned up. Viewers may not be able to identify why they respond to one of my images, but it is partly because I’ve taken the time to really clean the image up.
It’s worth going to the trouble involved, because half measures do not avail us! Let’s face it, this kind of post-production work is fairly arduous. If I am going to take the time to do it in the first place, I’d really like to get everything right that I can.
And, in case you are wondering, yes, I also had to retouch these issues in the reserved monochromatic version to conform to the color version.
Monochromatic Conversion
With the color version complete and retouched, and a monochromatic HDR version reserved, I am ready to do the overall monochromatic conversion. This involves a layer stack with different monochromatic versions combined at varying intensities using several Blending Modes—Normal, Luminosity, Screen, and Soft Light.
In the case of the Basilica, I started at the bottom of my conversion layer stack with the default monochromatic conversion from Nik Software’s Silver Efex 2. I layered on top of it the reserved HDR mono version selectively applied via a layer mask, and a second mono HDR layer applied overall using the Luminosity Blending Mode at 20% opacity.
To finish the conversion I added a layer to add texture and softness. I created this layer using the Topaz Wood Carving filter applied to the color version. This filter is found in the Topaz Simplify plugin, and my results are shown below.
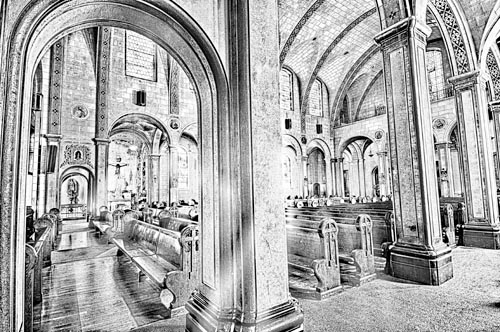
Flattening the monochromatic conversion layers led to the finished image shown at the beginning of this story.
Conclusion
Effective shooting for HDR is pretty straightforward if you have a good tripod, some patience, and use manual exposure controls to bracket the entire dynamic range of the scene you are shooting. For a full explanation of the technique please see Creating HDR Photos.
Crafting a unique and subtle look in post-production from an HDR shoot is not always straightforward. It helps to know where you might be going by pre-visualizing the results at the beginning of the process.
Even when I have some idea of the benchmark steps along the way, there is usually no firm recipe for my HDR conversions, and I do quite a bit of experimentation as I go along. So you should regard the steps I’ve explained in this story as waypoints on your conversion journey—subject to your own creative ideas, and not fixed in stone.