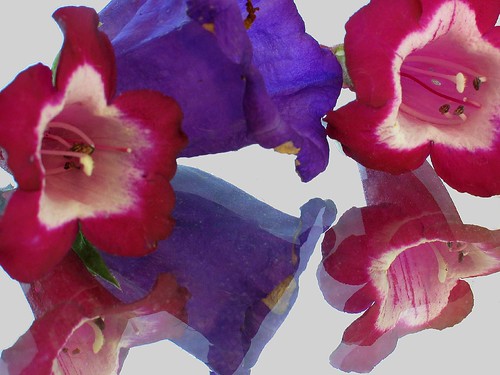
Julian put these buds from our garden on the mirror I use for a lot of my table-top work, and said, “Dad, take a picture of these and put them in your blog!”
Who am I to resist? Particularly when complying means procrastinating on “real” work – in this case the somewhat unpleasant chore of author review of my forthcoming Digital Photography Digital Field Guide to be published by John Wiley.
But taking the photographs in the set, camera mode set to macro, didn’t take up enough time. Next I had to “make” the photo right in Photoshop.
Digital photography and Photoshop go together, well, like a couple in a good marriage. They are perfect life partners, and it’s faintly silly to me to expect to take a picture with a digital camera and then not do at least the basics in Photoshop.
In this case, more than basics were needed. The mirror background showed some reflected details that distracted from the flowers. So I used the Magic Wand tool to isolate the background areas, and cut them into a fill layer. I applied a solid (gray) fill to the cut layer, and then recompressed it back to the image. Next, I did the routine stuff:
- Healing brush and Clone Stamp to fix imperfections
- Unsharpen Mask at about 200% to sharpen things up
- Adjust levels, using auto levels (in this case adjusting auto levels destroyed some of the transulence of the colors, so I undid it)
- Adjust contrast, using auto contrast levels
- Adjust colors, using auto color levels
I’ve heard that Photoshop Elements lets you do most of what you need without the expense of the “real” Photoshop, but I guess I don’t believe it after playing with the Elements puppy for a bit. If you are serious about digital photography, you might as well realize that Photoshop is a very welcome and fun part of your life!