
Photographers tend to collect gear bags. I have lots of camera bags. As photographer John Shaw once put it, I am a charter member of the “bag-of-the-month” club.
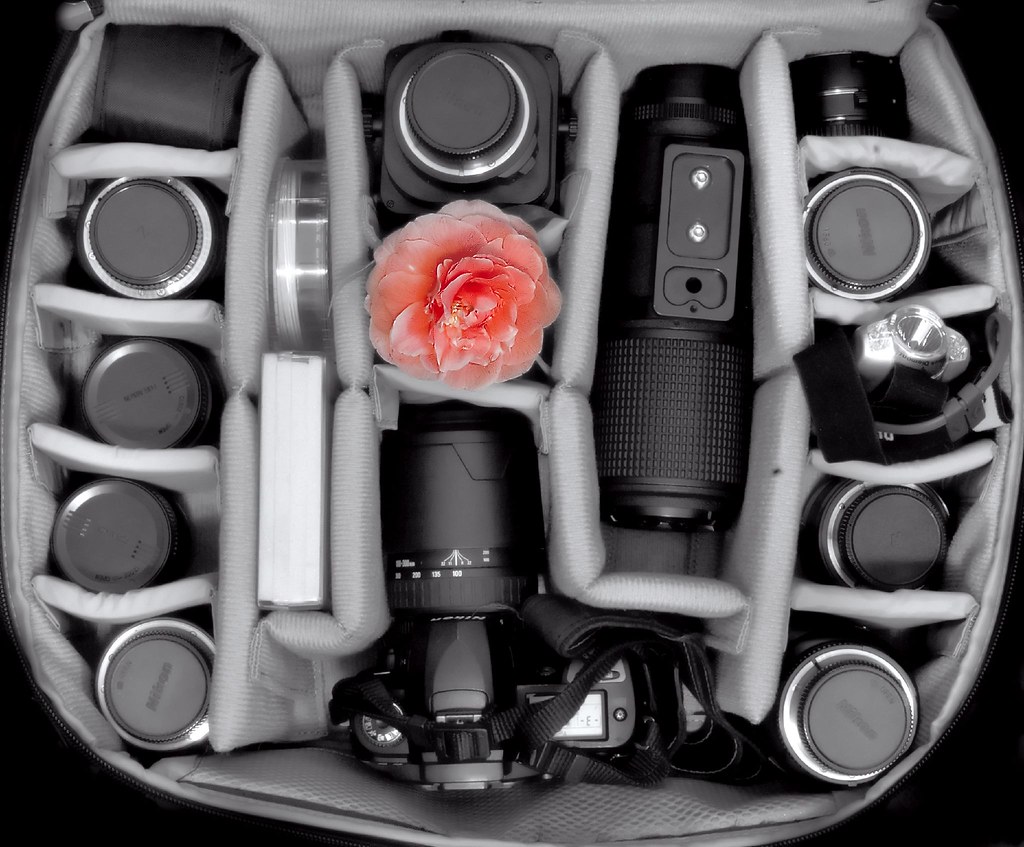
My favorite new bag is a LowePro Omni Trekker, shown above loaded with my photo gear and a camellia flower. I like this bag because it carries tons of stuff in a secure way and can be carried on my shoulder, using handles, or as a backpack. The bag also has a nifty feature that lets me pull my camera out without opening the whole bag via a kind of pass-through window.
As part of Lowepro’s Omni Extreme set, the bag fits in a waterproof case that can be used in conditions that are dangerous for photo gear. For example, I can pack this bag in the Extreme shell and take it on a white water rafting trip.
When I don’t need to carry so much gear, and I want something that fits well on my back, I carry a Lowepro Mini Trekker AW.
To create the black-and-white image of the camera bag loaded with my gear and a color flower, I first took an exposure straight down on the bag with the flower in position. I used a long exposure and a small f-stop for great depth of field (10 seconds at f/22).
In Photoshop, I duplicated the image, then converted one version to black and white. For information about how to convert digital color images to black and white, see Going with the Grain, More Black and White Conversion Fun, and Converting to Black and White.
My plan was to plop the color version of the image over the black and white version as a layer. Then I would need a layer mask (see From Filter Play to Layer Masking) to block out all the color portion of the image except the flower.
But I didn’t want to have to hand generate the layer mask by painting the flower shape on the mask, a tough job. So I created the layer mask with no hand work by duplicating the color version of the image, converting it to LAB color, and discarding all the layers except the A channel (Magenta-Green). In the A channel, the camellia flower was almost white and everything else was dark, so it didn’t take much fiddling with the Curve to create an acceptable grayscale mask.
Finally, I used Image > Apply Image with the color layer of the layered version of the image active to add the layer mask so only the camellia appeared in color.
Pingback: Photoblog 2.0: » Photoblog 2.0 Archive: » Snakes and Ladders
Pingback: Photoblog 2.0: » Photoblog 2.0 Archive: » Light
Pingback: Photoblog 2.0: » Photoblog 2.0 Archive: » Roof
Pingback: Photoblog 2.0: » Photoblog 2.0 Archive: » Dragonfly