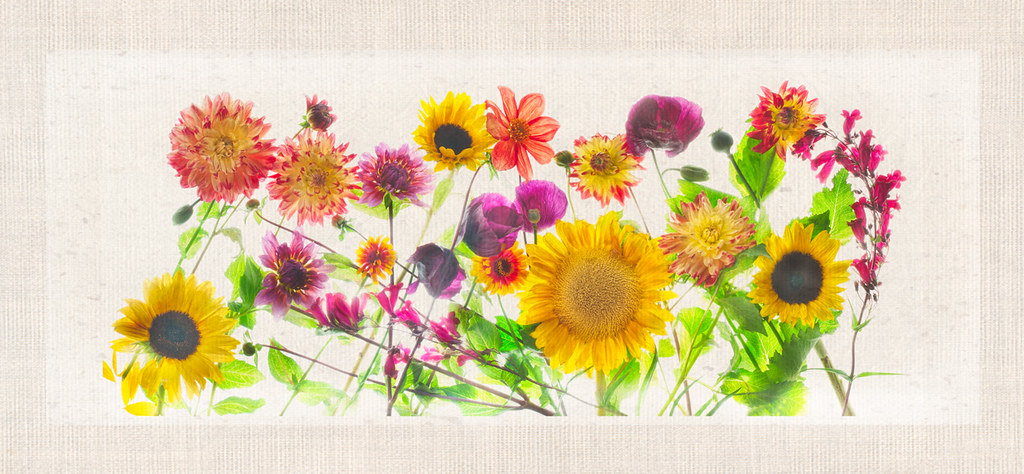
This is a floral HDR panorama, meaning I shot it in two horizontal pieces planning to stitch the pieces together. The logistics of this were somewhat complex—as with any HDR pano—given that each piece needed six exposures.
The idea behind HDR is to extend dynamic range, usually by shooting multiple exposures and combining the dynamic ranges of the individual exposures in the final result. Proceeding this way with each portion of a panorama leads to a fairly intricate workflow.
In this case, I arranged the flowers horizontally on my lightbox and shot straight down with the camera on a tripod. I used a 50mm macro lens set to f/14 for some depth-of-field with maximal lens sharpness.
Each of the two panels was captured using six exposures at ISO 100: 1/6 of a second, 3/10 of a second, 1 second, 2 seconds, 4 seconds, and 10 seconds.
I primarily processed the captures using hand-layering, starting with the brightest capture to promote translucency, as I explain in Photographing Flowers. I also blended in at about 20% opacity a layer of automated HDR processing via Nik’s Merge to HDR Efex Pro. I created presets, and made notes, and was careful to process both sides of my incipient panorama in exactly the same way.
In a “real-life” panorama—mostly outdoors in the landscape, or an interior architectural shot—one does more than 2 panels to be stitched. These are usually best executed vertically, not horizontally, include considerable overlap, and pivot around the nodal point of the camera and lens—not, as in this situation, created by physically moving the camera on its tripod from left to right to capture the other half of the flower-laden lightbox. My overall idea in making a two-panel lightbox panorama was to create the sense in the viewer that there were more flowers in the image than could be visually absorbed in a single glance.
So it is no wonder that when I came to put the two halves of my floral pano together that I ran into severe continuity and parallax problems. To give you the idea, with one flower stem lined up, then the rest would go out-of-register. Photoshop’s stitching software was an abject failure when I tried it; clearly, the algorithms had no idea what I was trying to do.
When the going gets tough, the tough get going. With a little help from some caffeine. When automating software fails, it is time for the human beings to get back in control. Cloning, warping, resizing, duplicating layers and moving, and correcting perspective on small pieces put the two panels together—hopefully in a way that looks completely natural.
The final result is an image that is close to twice as wide as a normal horizontal capture, roughly in a 2.8:1 proportion. The original file size is very high resolution, so there would be no reason not to print it, say, ten feet wide by about 30 inches high.
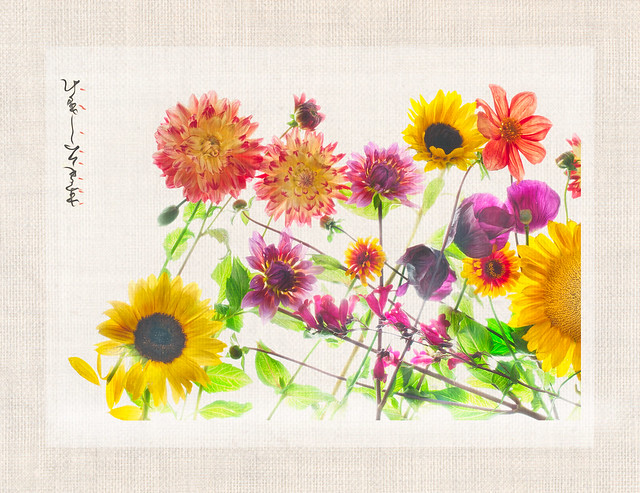
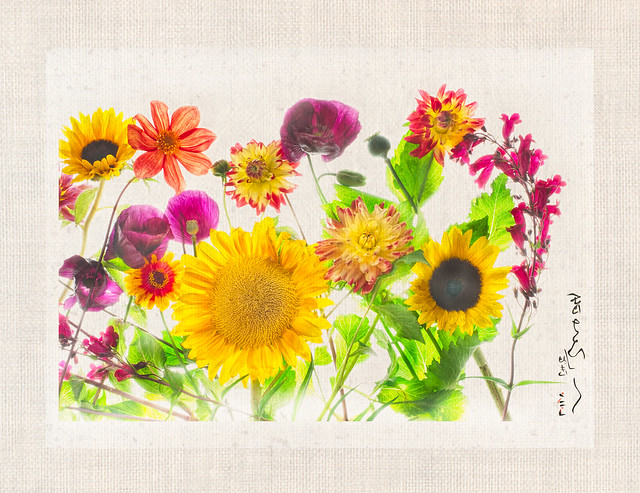
Along the way, I created versions of each of the two frames, and added some “calligraphy”—shown above and below. My idea is that these two “half images” work individually, as a pair, or on either side of the panoramic version.
Pingback: Japonica: Papaver Dreams | Photoblog 2.0
Pingback: Floral Tapestry Panel
Pingback: Floral Tapestries