
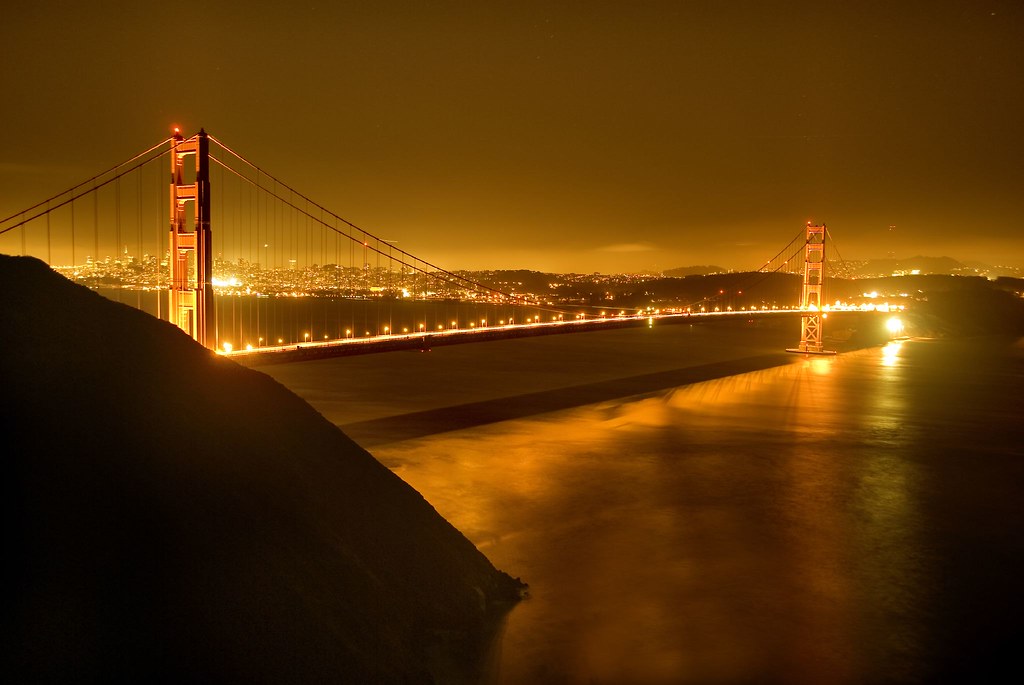
This is the final exposure from the other night on Marin headlands. Here’s an earlier view looking towards the Golden Gate Bridge bridge (and from a position slightly closer to the bridge), and a moon-and-star-scape taken, well, thirty seconds or so before this exposure (but looking in the opposite direction).
I think that I like this view best of all my Golden Gate Bridge views because as Nadine put it on Flickr, the photo shows a bridge that is “TRULY the GOLDEN GATE Bridge.” Yes, this bridge is golden.
In common with the other late evening (or nighttime) views, and indeed many of my landscapes, I post-processed this photo by exposing the RAW image several times and combining the different exposures. This process can feel a lot like combining photography with painting, since the amalgamation is often achieved by used the Photoshop brush tool on a layer mask.
It is emphatically not high dynamic range (HDR) photography, which stitches together multiple images with different exposures taken at the same time. I think I get more natural-looking results with multi-RAW processing than any HDR imagery I’ve seen. I’m also not quite sure why one needs the extra exposure range from many original images, since the RAW conversion itself gives you six stops of latitude.
These six stops range from -3 f/stops to + 3 f/stops, centered around the actual exposure. Bear in mind that f/stops are the denotation for the opening of the lens diaphragm, and are on a logarithmic scale. Each full f/stop lets in half the light of the f/stop that is next smaller. By the way, and somewhat counter intuitively, the smaller the f/stop number the larger the lens opening. So f/40 means that the lens is only open a little bit in its center, while f/2.0 probably means that the lens is open all the way (or almost all the way).
The 6 stop range means that from lightest to darkest with a RAW conversion the ratio is 1:1/2^6. (2^6 is notation for 2 to the 6th power.) Multiplying this out, 2^6 is 64, so in any RAW capture you have a 64X exposure range. This should really be enough for any exposure that doesn’t have over-the-top burn out aspects, like direct digital sun captures, which often look like dripping hard-boiled eggs no matter what the exposure settings. Even in this successful direct-sun capture, the sun is basically highlighted out.
It’s important in this time of a new and vital digital technology and craft not to lose sight of basics like how to expose photos, and the relationship of one f/stop to the next.
Pingback: glaro33
Pingback: Photoblog 2.0: » Photoblog 2.0 Archive: » A Pixel Is a Pixel
Pingback: Photoblog 2.0: » Photoblog 2.0 Archive: » Golden Gate from Middle Earth